By the time you finish reading this article, you will know how to capture and publish 360 images to Facebook using just your smartphone and a free app. Despite what so-called experts are telling us, you won’t need buy fancy and expensive cameras to make this happens. Here is how to do it.

Facebook just launched 360 allowing users to upload wide photos so that friends and family can now truly see their entire surrounding. You can upload a panorama photo from your iPhone or Samsung Galaxy and Facebook will convert it to a 360 image but you get better results when your original photo is taken with 360 in mind. Tech gurus everywhere have been responding that you need a dedicated 360 camera to achieve this. One expert even suggested I spend $500 to buy a special camera. That’s not going to happen. That’s because these experts have not discovered the power of smart stitching apps with ultra powerful algorithms yet. Microsoft has been in this space for some time with Photosynth. I remember testing Photosynth out on an iPad 2 way back and it worked fairly well. Now, Facebook 360 is taking 360 to another level by making it easy for anyone to showcase their entire surrounding.
Just Use Mobile Apps To Take 360 Photos for Facebook
I will continue to update this post as more apps become Facebook 360 friendly but to start it off, here is what you can do to create and publish a Facebook 360 photo. Gloria Tsang, registered dietitian and new media expert (in my opinion) was the one who showed me this method so a big shout out to her!
Here is how you can publish a 360 image to Facebook without needing to buy any hardware. Just use your iPhone (or any smartphone that can run Google Street View).
- Download Google Street View app (I am using the iOS version)
- Read through the 3-screen simple tutorial from Street View (it shows you how to take the photos properly)
- Open the Street View app and click on the orange + button and select “Camera”
- The app will ask you to “Point your camera at the dot”
- Once you hold your camera at the dot for long enough, your phone will automatically snap a photo.
- Keep rotating around your environment and point at as many orange dots as you want to show in your final 360 image
- If you choose to shoot all the orange dots, you will get a green check mark at the end to let you know you have selected all possible points
- Click the check mark and the app will do it’s thing
- Wait! It may take some time for the app to process your image. Wait for the little orange bar (as shown in the image below) to fully run through your screen. Once done, your image will end up in your camera roll as a still image.
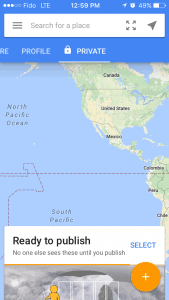
- IMPORTANT! Here is the part that you have to get right. DO NOT upload this photo using the Facebook app. It does not work, at least not for Gloria. Go to your Camera Roll, select the image you just created using Street View, and then click on the Facebook icon to upload it. Upload your image inside the Camera Roll, not the Facebook app!
Here is what Gloria shot with her iPhone 6 with no additional hardware. Click on the image to see it in full.
I am sure Facebook will fix the 360 issue in their app but in the meantime, anyone can now publish 360 photos using Google Street View and the above method! Thanks Gloria!
Be sure to share your 360 images as well. Would love to check them out!


